
I've been battling it out at my work this week, starting my new position and whatnot. I'll update soon!
- Jaa
 Quick update tonight,
 I usually spray a fine layer from about 6 inches away. Once this dries, construction can begin. Each part requires sanding, as to remove the excess primer, leaving the bare minimum. Clipping the parts with a spur-nipper and sanding down the spur flash needs to be done anyway.
 Here's a close-up of a forearm panel so you can see what the final product will look like. Typically, I will detail in sections. So once all the forearm parts are painted, I put them all together, then add detail lining and decals before moving on.
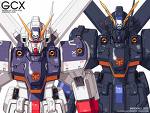
 I stopped here tonight. I really wish this picture was more clear and I'm going to have to figure out my new camera at some point because the close-ups turn out terrible. Anyway, what you see here is one of the back stabilizer wings. In the G Cruiser mode, this surves as main wing of the fighter. The reason I took this picture is to show what trouble can be found in a part that should have two seperate colors, but Bandai molded in one (for cost effective reasons). The edge of the wing should be Red. The wing itself should be white. See the issue? What I will end up doing is, now that the edge has been air brushed, I will use masking tape and cover the red sections, re-sand and paint the rest of the wing with white. Remove the tape and I should have a nice looking duel colored wing.
 *Edit: Click on the pictures for a much clearer picture!*
 Here's the right side of the shelf. My PG RX-78-1, MG Alex, and MG Zaku II F2 can be seen. My MG Blue Destiny Conversion is just cut off, but you can see its 100mm Machine Gun behind the Zaku II. Then we have the GFF Nu Gundam and F90-2 along with the Ultimate Op Stand Art Gundam Mk.II Titans. You can just see the wing of the HCM Pro Wing Gundam as well.
 And here's the master piece. The GP04 Bust that I waited for more than a month arrived and look at what an Amazing job GundamPro Shop did (Ebay seller GundamProShop) - I don't have the lights on, as I want to conserve the batter for as long as possible. You can also see the MG X1 behind it, both are actually dead center on my shelf.
 Here's my TV. My MG Gp02 and 1/144 Resin FA Gundam Mk.II as well as my DX V2 Assault were moved to the TV as clearly, there is no room on the main shelf. How is the GP02 actually holding it's shield you ask? It's permanently plastered to the display stand. I grew tired of it falling all the time. This works great though! The FA Gundam Mk.II is mounted on it's display stand in a similar fashion to the V2...a copper pipe running strait between the legs and attached into the base. He's very very fragile (I think it was a re-cast resin kit...actually, I'm sure of it) so this way, he won't fall ever again!
 Here's my Ultimate Operation Shelf. Q did a post today on various "Gashapon" collectibles in Japan, and Ultimate Operation is by far my favorite. The GP01, FA Gundam, Aile Strike and Dom Tropen can be seen, but the shelf actually goes down about four more cubes on each side. On top is my 1/100 Leopard Destroy (He's been through a lot...lost most of its weapons in moving) and 1/100 Burning/God Gundam from G Gundam. Its actually a toy, but it was a present so I keep it on display. I'm not a huge fan of G Gundam, but the Burning Gundam is pretty cool. It's fun to use in Dynasty Warriors Gundam for Xbox 360.


