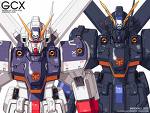
To begin every kit I build, I first wash all the sheets with warm water and a little soap or detergent.
Then its on to the primer. Primer comes in 3 main colors: white, grey and black. The darker the primer, the dark your colors will end up when painting. Priming the pieces also serves as a surfacer, filling small holes, and also gives the paint something to cling to.
 I usually spray a fine layer from about 6 inches away. Once this dries, construction can begin. Each part requires sanding, as to remove the excess primer, leaving the bare minimum. Clipping the parts with a spur-nipper and sanding down the spur flash needs to be done anyway.
Before Air brushing, I still hand paint a layer first, this creates a much more adhering surface, and gives a much smoother final surface for the final product. Here are two pieces for the forearm of the S Gundam. I normally will build a unit's core fighter (if available) first, however, with the S, I decided to start from the begining, which is the arms.
 Here's a close-up of a forearm panel so you can see what the final product will look like. Typically, I will detail in sections. So once all the forearm parts are painted, I put them all together, then add detail lining and decals before moving on.
White tends to be the most difficult color to air brush. However, I use (oddly enough) Testors Acryllic paints, so when air brushing with white, the paint tends to dry almost on contact, which avoids any "pooling" on the parts. I do recommend buying a bottle of acryllic thinner. Many say that water works fine, but in my experience, one small drop of thinner does wonders to avoid any clogging in the air brush (which happens if you let paint sit for a while and it dries within the passage ways).
 I stopped here tonight. I really wish this picture was more clear and I'm going to have to figure out my new camera at some point because the close-ups turn out terrible. Anyway, what you see here is one of the back stabilizer wings. In the G Cruiser mode, this surves as main wing of the fighter. The reason I took this picture is to show what trouble can be found in a part that should have two seperate colors, but Bandai molded in one (for cost effective reasons). The edge of the wing should be Red. The wing itself should be white. See the issue? What I will end up doing is, now that the edge has been air brushed, I will use masking tape and cover the red sections, re-sand and paint the rest of the wing with white. Remove the tape and I should have a nice looking duel colored wing.
Stay tuned for more!


2 comments:
The project has started! Since I am quite casual in terms of building gunpla, knowing about how you do it with the paint and tools is new and interesting to me.
Btw might sound trivial, but do you wash the runners (sheets) to remove stains and grease so that the primer sticks on the surface nicely and without problems?
You bet Q - The first thing I do is wash all the runners in gentle detergent and warm water, you're right, it helps so much!
Post a Comment